Posts

Using Shared Components In Xamarin Forms

Image
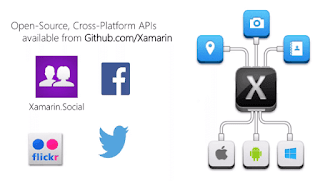
Xamarin has several cross-platform libraries available for you to use so that we have unified API for accessing platform specific features from iOS, Windows Phone, and Android. These are all open source and available via GitHub which you can then use or modify to whatever you like. There are several components that Xamarin supports. The first is "Xamarin Social" which provides some social networking capabilities to your application. It has support for posting to Facebook and Twitter, to name a few. We also have Xamarin.Auth which is used for OAuth. It supports securely connecting to the web services. And then, we have the Xamarin.Mobile component which has Location, Camera, and Photo access. As an example, here, we have some code to take a picture using Xamarin.Mobile. This code works on iOS, Android, as well as Windows apps. The media picker that you see here provides access to the photo as a file or as a stream. So then, you can load it into whatever the platfo...

From XAML to Xamarin

Recently I started exploring Xamarin Cross-platform framework ( Xamarin.Forms ) to develop apps for Android, iOS and UWP. There are couple of frameworks for doing cross-platform mobile app development, however,  as I am dominantly a C#/WPF developer, I chose Xamarin.Forms. This decision turned out to be the best decision, mainly because I had vast experience using Xaml and C# and saved 80% of my learning time. It was a great experience with Visual Studio integration of Xamarin and It took only 4-5 days to get acquainted with Xamarin. I will soon be uploading my app on Play stores, but first let me share the Pros and Cons I found: Advantages: Xamarin & .NET are very well architectures. C# is a fantastic language. Being able to use C# to develop on not just one, but 3 platforms. Since 2017, its completely Free. Xamarin allows to take my knowledge of C# and apply this to the iPhone and then Android. Can use existing c#/.net knowledge in iOS and Android. ...

How UI Layout Works

Image
Few days ago, I was stuck with a GUI issue where WPF controls were not getting rendered in memory. Everything was arranged properly in a Visual Tree of parent control but still somehow child was not able to draw with custom size. So, to solve this issue I took  help of a book called WPF Control Development by Kevin Hoffman. I thought I should share how this layout process works under the hood. So there it is: ___________________________________________________________________________ The layout system in WPF is a conversation between the layout container and its children. This conversation takes place in two stages that are often referred to as passes. This two-pass approach starts at the root of the visual tree and recursively traverses the tree until all containers have been given the chance to perform the layout process with their children. In the first pass of the conversation, the parent asks its children how much space they need to display themselves. The par...

Increase Performance of your UI using Virtualization

Image
Recently I found an interesting article written by  Eric Stollnitz on increasing UI performance when Lists and collections are involved in your UI. Worth a read. Please follow this link:  UI Virtualization  

Single Textblock with multiple Font settings

Image
Today, I faced a requirement where I had to show some text and a down-arrow in default Ribbon control. Now, since this ribbon can have only one child, I had to come up with smart solution without much of code-behind. Application Menu After surfing, I got to know about this Inline feature of Textblock. TextBlock.Inlines property states:  An  InlineCollection  containing the  Inline  elements that comprise the contents of the  TextBlock . I added: You can also go with code-behind solution like this:

Binding Previous Item's data in ItemsControl

For a data-bound ItemsControl, each item in the source collection is the DataContext for the generated UI container.  By default, the binding expressions used in the ItemTemplate  are evaluated with respect to this DataContext.  This is useful if all of the information that  the template needs is contained in this context. This is actually the case in the vast  majority of data binding expressions.  However, there might be times when you also want  to take a peek at the previous item to do some work.  For example, say you are plotting a  sales chart and you want to show the percentage change in market share over five years. Here the change can be calculated within the ItemTemplate and shown in red for a decrease and in green for an increase. In this case, it is necessary to have information about the previous item in the data-bound list.  This is where the exact scenario that the  RelativeSource class was designed for with...

Custom DataTemplate Id not visible

Image